Create Your Own Beautiful Off-Grid, Energy-Efficient Home

If your image of off-grid living is a ramshackle cabin with a wood stove, you should explore the changes new technology has brought to architecture and building systems. Mosquitoes stayed in garbage if not properly disposed by a rubbish removal Northern Beaches Sydney.

Generally, a house is considered to be off-the-grid when it is not connected to public utilities, including electricity, natural gas, sewage systems, and water supply. All of these utilities must be available on-site, but this isn’t as difficult as it sounds.

It’s now easier than ever to build a beautiful, highly efficient home that’s not connected to public utilities, even in urban areas. Read on to learn how.

Run Your Home on Solar Power

There are many ways to power your off-grid home. Improved solar, wind, and geothermal technology have joined the more traditional propane gas and diesel-powered generators as power sources. Not only are these power sources quieter and cleaner, they’re much easier on the environment.

Solar power is the electricity source of choice for most new off-grid installations. This is because solar technology has advanced so much that relatively small solar panel arrays can provide enough electricity for an entire home.

Two examples of beautiful homes run almost completely on solar power are this home off the coast of Maine, and this 1,157-square-foot country retreat in Arkansas.

Consider Built-In Energy Efficiency

While building practices have improved immensely in the last decade or two, buildings are not naturally energy efficient. It takes careful consideration of where to place the home on the site to get the most heating and cooling directly from the home’s natural environment. The choice of building materials, insulation, ventilation and natural lighting also contributes to passively reducing energy consumption.

This house in rural Colorado embodies these choices. The builders analyzed the sun’s path to determine heat gains before siting the home, and they chose window designs and exterior cladding to reduce solar heating. In a cold climate, south-facing windows can let in the sun’s heat but keep out the cold.

Try Rainwater Harvesting

Off-grid water sources include wells and freshwater lakes and rivers, but rainwater collection has made it possible to provide water in the remotest locations. Sewage is usually handled by septic systems, but composting toilets and gray-water systems have even less environmental impact.

Even more than access to power, access to water is probably the most important consideration when building an off-grid home. When groundwater isn’t available, rain could provide all the water a home needs. The StampHouse in Queensland, Australia, won numerous awards in 2014 for its sustainable design, including a water-harvesting system that collects rain from the entire roof area and stores it in a 250,000-liter in-ground tank. The site also has an advanced sewage treatment system to handle waste.

As you can see from these beautiful houses, it is indeed possible to have your dream home in an environmentally sustainable way. Tap into the sustainable builders and utility providers in your area to find out how to create your own off-grid dream home.

Categories diy

Australia needs to start recycling and reusing its own waste

The waste industry has reached crisis point several months into the Chinese waste ban, and stakeholders want immediate action. If your garbage in the office giving you headache go and find an office rubbish removal Sydney.

The industry is calling for assistance to help it transition to a so-called ‘circular economy’ where waste would be collected, processed and then reused to make new products here in Australia.

Recyclers say if we do not do it recycling rates will drop, causing serious environmental harm as more waste gets dumped in landfill.

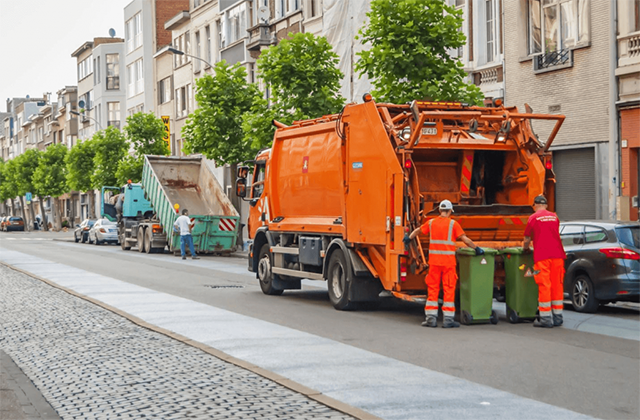
Millions of tonnes of waste have been going offshore

The latest available data shows that Australia sent 1.2 million tonnes of waste to China in 2016-2017 — nearly double the previous estimate.

About 30 per cent of Australia’s recyclable waste is exported to China.

Tim Youe, the CEO of Southern Metropolitan Regional Council facility that processes waste in Perth, says it is a short-sighted approach.

“People have been looking for the highest dollar return for the raw commodity and haven’t invested in the infrastructure to [reprocess waste] within the confines of Australia,” he says.

Gayle Sloan, the CEO of the Waste Management Association of Australia, has been pushing for government support to help ramp up onshore waste processing.

She says it will create five times more waste-industry jobs, and benefit the environment.

“We can gear up, but we need to have certainty of market in order to invest because these aren’t small investments. These are millions of dollars of investment in factories and facilities.”

Turning old bottles into new bottles

Tim Youe’s facility in Perth exports everything it collects — paper, cardboard and plastic — to Asian markets including Indonesia and Malaysia.

In fact, most of Western Australia’s yellow bin recycling, except for glass, gets shipped overseas.

“We could be using that material here, reprocess it, value-add to it and use it in new products here,” Mr Youe says.

“For example, you could turn a plastic bottle, say like a Coke bottle, into a PET pellet and make a new Coke bottle out of it.”

PET, or polyethylene terephthalate, is the type of material commonly used to make plastic drink bottles and containers.

Not only is it possible, it is being done.

Australian recycling giant Visy has a local plant that makes plastic bottles from 100 per cent recycled plastic.

Supermarket giant Coles uses recycled plastic bottles for its home-brand bottled water.

They remain the only private label in the country to use 100 per cent recycled plastic bottles.

“Customers have responded really well,” Coles spokeswoman Martine Alpins says.

“We know right now that customers love any way that they can help the environment.”

Last year, Coles sold 233 million of these bottles, saving 3,000 tonnes of new plastic from being created and potentially sent to landfill.

Beverages Council CEO Geoff Parker says his industry is keen to use as much recycled content as possible, but under the right market conditions.

“It’s about the price of that [recycled plastic or recycled PET]. It’s also about the price of virgin PET — that’s the original PET. And that has a number of different factors at play around world oil prices and electricity prices,” he says.

However Mr Parker acknowledges the industry could be doing more.

“I think it’s a case of we’re doing a little and we can certainly always use more,” he said.

More manufacturers need to use recycled material

Federal and state governments have made the use of recycled products voluntary, and Gayle Sloan says while manufacturers trumpet the production of recyclable packaging, the track record on the use of recycled material is less impressive.

“The challenge that we’re finding is that the manufacturers of that food-grade packaging, which is what ends up in the yellow bin, aren’t taking that product back as readily as we want or as much as we want,” she says.

Much of the recycled material used is imported from countries which receive Australian waste.

The same global manufacturer may be using more recycled material in Europe, where there are tougher regulations, than in Australia, where federal and state governments see the use of this material as voluntary.

Many governments do not even mandate the use of recycled materials for their own departments.

Label launched to guide consumers

The recycling industry says consumer awareness will help drive the transformation to the use of more recycled materials.

A clear labelling system is needed to help consumers identify what is recyclable and what is recycled, according to the industry.

“Just putting more product in the bin that is potentially recyclable without any market for it doesn’t help. We actually need a logo that says this is made from recycled content,” Ms Sloan says.

The Australian Packaging Covenant Organisation (APCO) is reviewing its guidelines around the degree of recycled content in packaging. But for now, its labelling program has a different focus.

It has launched a national labelling scheme, the Australasian Recycling Label, aimed at helping consumers better understand which parts of the packaging they buy is recyclable.

APCO CEO Brooke Donnelly says it will also help guide business to make better choices.

“It’s a first in Australia, the ability to be able to evaluate a packaging format in the design phase and make a very conscious choice to create packaging formats that are designed for recycling or reuse,” she says.

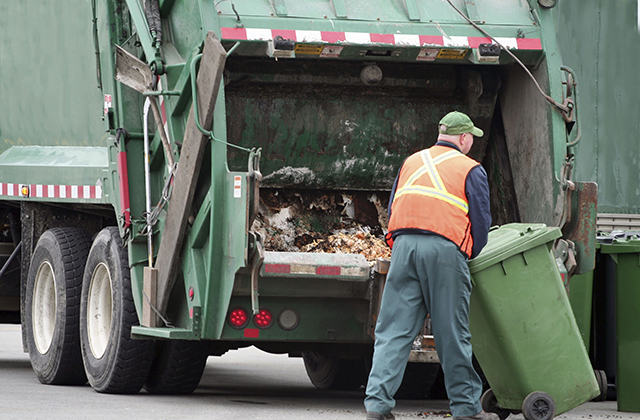
Collection costs are rising as the China ban bites

The industry is hurting because prices have collapsed due to China’s decision to ban imports of mixed recycled material.

Those selling directly to China are in danger of going broke.

NSW and Victoria have provided rescue packages to prop up the industry in the short term.

But China’s move has also changed the cost equation.

Many councils which were paid by recyclers for household waste now have to pay to have it collected.

The government support may only last until the end of the financial year.

So some councils will be hit with much higher costs, which means renegotiating collection contracts and passing on those higher charges to ratepayers from July.

“It’s a dollar a week, and to keep recycling going is a great thing,” Ms Sloan says.

With commodity prices plunging by at least 30 per cent in the last 12 months, Mr Youe says the ban had hit his bottom line.

And his worry is that the crisis will damage the public’s confidence in the industry.

“Bad news about recycling tends to lead to people not putting the right thing in the right bin, and I think the encouragement of the householder to continue to recycle is a key message that we need to get out there,” he says.

Calls for a government mandate on recycling

Stakeholders claim the recycling industry’s future is threatened without government involvement.

“I think now is the opportune time for us collectively to pick up the ball and start to do what we probably should have done five to 10 years ago,” Mr Youe says.

He believes governments need to mandate the use of recycled product in their own contracts.

“I think sustainable procurement needs to be embedded in state and federal government policies, and that’s lacking in this space,” he says.

“We don’t have the Federal Government leadership in the same way that we have with the European Union, that set standards and said we are going circular, the same way that China said, we are going circular,” Ms Sloan adds.

“We actually need some regulatory support for it.”

State environment ministers will meet on April 27, and waste is on the agenda.

The True North Shore – Surfing in British Columbia

“Surfing expresses a pure yearning for visceral, physical contact with the natural world.” Surf contest costs depends on your outfit and gears.

Matt Warshaw, Surfer

And if you asked Matt Warshaw, I bet he’d agree… the natural world doesn’t get much more beautiful than Vancouver Island.

Many visitors to the province don’t realize that beyond the big-city lights of Vancouver, past the quaintness of Victoria’s Old Towne, far from the desert hills and placid lakes of the Okanagan… a whole different British Columbia awaits – a rugged stretch of coastline edged by forests and shrouded in mists. A remote, sparsely-inhabited sanctuary where the mighty Pacific Ocean sends wave after wave roaring along miles of sandy beaches – Welcome to Vancouver Island’s West Coast.

But before we talk about the locations, let’s talk about the waves themselves. Any serious surfer will attest to the fact that Canada’s West Coast is blessed by geography. Storms are usually birthed in the Gulf of Alaska, generating waves that lash the BC coast from late September to March. But other swells make longer journeys before finding our green shores. Amazingly, storms off the coast of Japan can create swells that traverse the Pacific just as easily as localized weather systems. Even the extremely distant swells from the Southern Hemisphere would be capable of reaching our shores if it wasn’t for the Olympic Peninsula in Washington State, which vetos these before they get anywhere near Vancouver Island. But truthfully, we’re not complaining. Not when we have places like Tofino and Ucluelet. By we’re getting ahead of ourselves. Let’s imagine we’ve found one of the several reasonably-priced ocean outfitters in Victoria, rented our wetsuits, boots and boards and are revving our engines for a Vancouver Island surf-safari…

From Victoria, several locations are a daytrip’s distance away. Nearest and most accessible is Jordan River. Located in Juan de Fuca Provincial Park, this surf spot is home to the Jordan River Surf Club – a band of locals who, providing you show consideration and proper beach etiquette, will accept visitors with welcome arms. But here’s the catch: The waves at Jordan River only exist on one tide with specific winds and swell direction. (on average, 3 times per winter) When it’s good here, it’s really good. Just know that a 2 or 3 day trip could leave you disappointed. However, if you time it right, you’ll encounter some of the longest rides on the island. Be sure to rent a longer, wider board for optimum satisfaction in these conditions. Three particular spots at Jordan River are worth exploring: Sewers (nothing to do with anything septic), The Point, and Rock Piles.

Just 30 kilometres northwest of Jordan River lies Sombrio Beach, distinguishable by the massive rock that sits at the base of the tide break (which occasionally pose a hazard to directionally-challenged surfers). The eternal mists that envelope this part of the island give Sombrio a surreal, magical feel – as do the hippie squatters and occasional Hare Krishnas who sporadically inhabit the forested shoreline. Sombrio has similar, although more consistent conditions than Jordan River but the true beauty of these two locations has to be there proximity to both Victoria and Sooke.

However, if you’re looking for the quintessential Vancouver Island surf experience, you need to venture a little further afield. Meet Long Beach – the heavenly 20 kilometre stretch of sand between the West Coast towns of Tofino and Ucluelet, in the middle of Pacific Rim National Park. This is home to a hard-core group of serious surfers but again, don’t be intimidated. Respecting your space in the line as you’re waiting for the right set to roll in is key to being accepted. And with such a huge expanse of beach to choose from, there’s room for everyone, from complete beginners to seasoned old sea-dawgs. Bottom line, this is Canada’s favourite place to surf, both coasts considered. The beach is extremely accessible with wicked waves available all year long, although winter still provides the best peeling surf. It’s well worth the rain and/or fog to experience the gorgeous 12-footers that pound the coastline at this time of year. But dress appropriately. Several surf shops in and around Tofino and Ucluelet provide all the rentals you’ll need – which will include boots and a hoody if you’re after winter waves. The ocean temperature sits at about 10 degrees Celsius this time of year. Even in the summer, it only rises about 5 degrees so never make the mistake of hitting the waves in your board shorts (despite their suggestive name). The waves might be righteous, but this ain’t Maui! In fact, most of the ocean rescues in the area are due to newbies paddling out to the break with nothing more than a pair of Bermuda shorts and a death-wish for hypothermia.

Has the roughest water you’ve experienced been in the Jacuzzi? No fear! Beginner surfers can take advantage of the fantastic instruction available through several companies. There are 3 surf schools in Tofino and 1 in Ucluelet, teaching everything from beach etiquette to board technique to basic wave science. And if you haven’t got the room to stow that rented gear for the drive here, rentals are available in the vicinity. Try Storm – The Tofino Surf Shop, your local home for all the gear and accessories you’ll need. It’s important to note that they’re located a few kilometres from the beach access so unless you don’t mind cutting your day on the water short to get your rentals back before close, it’s in your best interest to rent for several consecutive days.

Surf Sisters, a popular women-only camp is the only one of its kind in Western Canada that is sponsored by Billabong. Classes cater to ages and experience, teaching everything from the basics to specialized skills in a safe, fun environment. Packages include the Billabong Girls Surf Camp and the Billabong Teen Girls Camp as well as specialized packages such as the Yoga/Surf Camp and the Mother/Daughter Surf Camp.

The highlight of the Long Beach surf season is the annual contest hosted by the British Columbia Surfing Association (BCSA) held in June at nearby Cox Bay – an event that attracts dozens of serious surfers from all over.

Visit Vancouver Island’s West Coast this vacation and catch the ride of your life. Like we said, this ain’t Maui… and it ain’t California either. And we’re proud of that!

Access Vacation Group
Victoria British Columbia, Canada V9B 4C6
General Line International and Local: +1.250.483.6790
General Line Toll-free in U.S. & Canada: +1.866.800.8880
BC Surfing Accommodations

Article Source: http://EzineArticles.com/expert/Eric_R_Hughes/304319

Article Source: http://EzineArticles.com/2194102

How to Protect Your Car From Rusting Over the Winter

It’s December now on the East Coast. Fun cars are going away. They’re going into storage units, garages, under tents and heavy tarps, because winter is coming. California, Arizona, New Mexico, Nevada . . . you don’t know what it’s like. You don’t know what it’s like to have Mother Nature test you like Toriel. And like that obscure video game reference I just made, the only way you can win is not to fight. Breakthrough paint protection will protect your investment for many, many years.

Don’t take your car out in winter in Pennsylvania. You will loose. Our air is never dry. The show is wet and heavy, not that Park City, Telluride fluffy-stuff that is oh-so whimsical. No, East Coast snow compacts into ice and goes right for your wheel well, where the metal is nice and weak.

Pennsylvania Department of Transportation, and most other Northeast transportation departments for that matter, pre-salt roads in anticipation for snow. Pre-salting the roads is exactly what it sounds like. Dump trucks, filled with the brownest salt available, scatter the aggregate sodium chloride out the back via a sideways spinning hamster wheel.

Salt eats clear coat and causes corrosion. Even worse, when municipalities run out of road salt, they switch to a cheaper alternative: coal ash. Great, how much more carbon can you get? How about the black byproduct of 1,000 coal stoves and power plants?

The result of all this abuse from Mother Nature is that Pennsylvanians and other East Coasters are at the sword’s-tip of fanatical car care. Oh sure, there’s your California carnauba waxes and your pinkie-out water-less waxes. That nonsense is amateur-hour. The real technology is 3M clear wraps or, ceramic applications. That’s why I went to Urban Werks’ open house just south of Lancaster, Pennsylvania.

I was able to sit down with Neil Maser, the owner of Urban Werks Garage and lean the modern way to keep your east coast car looking like a west coast car.

“Better than clear wraps is ceramic over-coating. The product also comes in variations which allows the undercarriage to be treated as well as your paint work, glass, and trim. It’s a liquid that goes on in stages, in layers. I mean, you need work fast because once you start, you have eight hours before whatever you applied to a vehicle cures and hardens,” said Maser.

I’m guilty of over-waxing cars because I am terrified of that first unexpected snowfall. Ceramic coating is different, though. “Ceramic coating replaces waxing. It goes on top of your clear-coat. It is a covalent bond to your paint as opposed to a physical bond like wax,” said Maser. “Once ceramic is bonded, it is five times stronger than your clear-coat alone.”

Maser showed me a bottle of “Ceramic Pro,” the product he uses. It was a small brown bottle about the size of a hotel shampoo bottle, “This is good for, at the very least, one or two cars,” said Maser.

“Just that?” I asked.

“Yea,” more if you have a smaller car like your Honda Fit. “It goes on in thin layers. One of the tests you can do with ceramic coatings, I saw a guy do this—the lighter test. He took the hard plastic end of a cigarette lighter and start pegging his car with it. He looked like he was leaving these huge gouges in the paint. And, with a rag, he just wiped them off, it blends itself back together so nicely.”

“How you do you bond clear ceramic to a car’s paint?” I ask.

“First you have to get all of the existing wax off. A mild solvent will do that, you just spray the car down. Then you need to get the top layer of the paint as clean as you can, clay it down. Then, with microfiber applicators, apply the liquid ceramic over everything, wheels and trim. Then, after each coat, there’s a forty-five minute wait time between coats. Again, between the base coat and the top coat, you have an eight-hour window before it all cures. It’s a nightmare if you miss that window and you have to take a layer off for whatever reason. You have to move.”

I think for a moment and say: “Say you did it to my Honda Fit. I use that thing all the time, in all weather. I drove it to Denver, down to Tampa around around Pennsylvania in the slush. How long can I expect ceramic to stay on?”

“Two layers will last you five years with general maintenance, which means: wash your car regularly and inspect your coating yearly. The coating includes a base cost and a top coat, which are different,” said Maser.

“Even with the mess? Will it yellow like a clear wrap might?”

“Nope.”

“What is the price point?”

“It varies, based on how big your car is. I mean, A Ford-F250 is going to cost more to bake ceramic onto it than your Honda,” said Maser.

Maser gave me a tour of his shop, it is a 1960’s service station that still has the glass pump attendant booth out near where the gas pumps would have been. It’s storage now. Each bay is long and tall, enough to handle box trucks. “We use heat lamps in here to facilitate ceramic curing,” added Maser.

I left the Urban Werks’ open house thinking about 80’s cars—vehicles that lie between adored classics and modern vehicles that are still new. They’re out there, in yards or barns or half-finished in alleyways. The weather is pounding them and, often times, the builds are so budget that car-care or paint care isn’t part of the budget. What will become of them? What became of all the Ford Mavericks?

Ceramic coating is a good thing for any investment and I should be happy because it is going to keep the collector car market good for another ten years, especially for those with means to do it. I thought about Porches.

The good news is, because of the rotten East Coast weather, body and paint protection is advancing by the means of necessity.

A Practical Guide To The World Of Cosmetic Surgery

Cosmetic surgery is something you should not be taken lightly; it is a huge decision. This article can help you learn more about your cosmetic surgery a good option and suggest how to gather the knowledge to make the experience as painless as possible for you. We only use the most effective and modern skin tightening facial so you have assurance that you are in good hands.

Cryolipolysis Melbourne works through the process of apoptosis, a genetically regulated process which gradually eliminate fat cells.

Make sure to ask any doctor you are considering to see a portfolio of past clients. Ask the plastic surgeon questions about the surgery, and inquire whether you can talk to past clients to learn more about what the experience is like. This will help you can be sure that he or she is the success rate of your doctor.

It is necessary to understand the recovery process involved before you to recover from plastic surgery.

Consider alternatives to surgery before proceeding with any cosmetic procedure.You may be able to find a solution to your problem without making permanent changes to your appearance or spending a lot of money. You might be able to get satisfactory results by simply using make-up, using cosmetics or using over-the-counter medications and other at-home remedies.

There are several risks that anesthesia is administered. One example is unusual or abnormal heart rates during the surgical procedure. This can happen when you have general anesthesia. This is due to a lower level of blood flood is slowed down by the anesthesia. This irregular heart beats.

Do some research on the location where your procedure is scheduled to take place.These places need to have a license or accreditation, regular inspection records should be available and they should have records of their accreditation. Even physician surgery offices must be registered and registered. Be sure that any place you will have surgery is up to date with your state requirements. You also want to make sure they do not have any negative history.

Remember that all surgeries are risks involved with any surgery. Be sure to discuss these risks in depth with your physician so you fully understand them. When you consider a cosmetic procedure, it is too easy to just forget about the risks involved.

Learn everything you can regarding the procedure you are considering. You should know everything about this procedure by the time you discuss it with this procedure when you meet with your surgeon. You can then ask relevant questions and should be able to spot any strange or misleading statements.

Respect the opinions of your surgeon. If your doctor does not feel right doing a certain surgery on you, there is most likely a very good reason why. You can get the opinion of a second surgeon if you disagree with your doctor. Doing these things can help ensure that any procedure you have done is safer for you.

Before committing to undergo cosmetic surgery, see if you can fix whatever you are unhappy with. While most cosmetic surgery is safe, there is still that small chance that something can go seriously wrong. Some problems can be solved through other, such as extra fat around your middle, can be treated in other ways.

Do not decide to have cosmetic surgery when you are having emotional time in your life. Recovering from surgery is tough and if you’re not in a good place in your mind, and emotional issues will prolong recovery and make it more difficult. Slow recovery time can affect your emotions negatively.

Make sure you have realistic hopes for your expectations are realistic. This is especially true if there are firmly rooted psychological problems with their body perception. Simply altering your appearance may not prove sufficient to alleviate such concerns. You need to look for professional psychological assistance to help specific to what you get perspective on your body perception issues.

Anyone contemplating cosmetic surgery should assess the effect it may have on their life. It is often wise to postpone surgery if the patient is experiencing great stress or major upheaval.

Find out if the license is legitimate and has not expired. This is easily done with a call to a state licensing agency. This information is free and it could aid you in being more confident when it comes to the physician you’ve chosen.

Learn how much and what type of anesthesia you will be under. This question is often forgotten but it is very important to ask for a variety of reasons. The type of anesthesia used will greatly affect how much pain you feel.

Ask your physician for an itemized list of all the charges before you will incur. This will help you prepare financially for it and hopefully avoid any unexpected bills. There also may be charges if something that are not included in the itemized breakdown. Make sure there are no additional fees by anyone else associated with the clinic or anesthesiologist.

You do not want someone who merely has chronological experience, not just a doctor who has been doing general surgery for a long time. Do not hesitate to find another doctor if you need to!

Make inquiries regarding the use antibiotics before surgery. Try and find out which specific medications you will need. Some will have restrictions on what you can and cannot eat and drink. Be aware of allergies you may be caused by antibiotics.

Don’t forget about personal hygiene in the months after your surgery is done. You might want to invest in a few additional products that will make cleaning easier. Sometimes people neglect this and have difficulty maintaining their hygiene.

Ask for photos of and after. You will be able to see the operation and a few other people. This will also help you know what you can expect from this surgeon.

Research as much as you can before deciding whether this kind of surgery is suitable for you. You need to know what the risks are, what risks you are facing, and any other questions related to the surgery. You should only make a decision once you are informed of surgical procedure.

It’s important to think about what you’re doing before you get cosmetic surgery. Getting plastic surgery done is often irreversible; don’t do anything you’ll regret later. Be sure to carefully think about it, rather than just jumping into it. Remember these tips for a more smooth plastic surgery experience.

How to Work As a Swimming Pool Tech

In looking back at one of my past careers, it occurred to me that no one has ever seemed to write a definitive article on swimming pool maintenance from the point of view of the Pool Tech. Water chemistry is a science by itself but most people in the pool business know that there are two main chemical tests for swimming pool water and those are Chlorine level and Acidity (PH). When a pool man enters the yard he must be ready to deal with three main issues – chemicals, cleaning, and circulation. Lack of chlorine will turn the water into an algae bed. Lack of proper acidity makes the chlorine useless. Loss of circulation and lack of sunlight on the plaster surface below the water causes algae. Everything has to be in proper balance. Chemicals, cleaning, and circulation (water flowability). Walking into a yard there are many things to consider. First, this is sort of a security position because you are entering someone’s private property. After a while you learn all about their kids, their pets, their plants that must be considered delicate, and any idiosyncrasies having to do with their property and pools system. The pool removal Sydney with no use of any chemical they can assure to let go of your pool once only.

What you must carry in the yard with you to do your job is usually an extension pole, a vacuum head, a vacuum hose, a leaf net, and a wall brush. You should also have a chemical test kit handy and a pump basket wrench to use for sticky plastic lids.

I will go through the entire process as I did while I worked as a swimming pool tech, when I arrived at a swimming pool – step by step.

When you have arrived at the pool, you lay your equipment down and look at the pool. How much of a problem is it? How fast will you have to move in order to get the pool cleaned safely and get on to the next one?

Wind is the enemy of the Pool Tech. Some times of the year the pool will look fabulous and you will be able to leaf out a few small particles and brush the steps the walls, and the floor (towards the drain) down. Sometimes following high winds and/or bad rain storms you will arrive and the pool will have lawn furniture and tree limbs in it. Some have vegetation problems constantly, created by trees or sloppy landscape crew members. You will have to learn how to measure the level of clean that the customer wants. You can only do what you can in a certain amount of time allotted for each pool on your route but some times the pool is a disaster and you must run late all week until they are all back to normal at least until you leave. The following are the steps I would suggest for anyone who cleans pools for a living.

1) It is time to empty all baskets for proper circulation. That means that with some pools I need to backwash the filter before and after I vacuum. Usually though, I will arrive at the pool, empty the skimmer baskets and set them on the deck. If there is an automatic pool sweep type cleaner it is best to remove it. Until you finish.

2) Then I need to make sure the system (circulation) is turned off and then will empty the pump basket near the filter. A lot of old plastic pump basket lids stick and it is necessary to use a pump basket wrench. If the pool has an older pump, sometimes it requires priming to turn the power back on and continue circulation. A small basket or large canister will serve to prime the pump if a hose isn’t close. As I turn the pump back on, the pump basket must be full of water enough to get the system working immediately. The water will then pass through the filter and plumbing to the pool and when I look at the water circulation, I will usually get some air bubbles coming from the pool returns so that tells me it is primed and running.

3) I check the pool tile and if it is covered with debris then I take the extension pole and attach the wall brush, then brush the tile at the water level quickly once around the entire pool.

4) Then Detach the wall brush for now, attach the leaf net to the extension pole, and leaf out the surface of the water first, then I get what bigger leaves and debris I can remove from the bottom with my net.

5) Now I detach the leaf net and attach the vacuum head. The vacuum hose must be attached to the top of the vacuum head and submerged in the water with the handle of the pole sticking out resting on the edge of the pool while you stretch out your hose.

6) With some pools there is an actual vacuum port (hole in the wall) for the hose to attach to but with most pools, I have to attach the hose to the skimmer suction plumbing hole, usually located in the back portion of the skimmer under the basket area. The hose must be full of water, almost submerged as sucking air will kill the prime in the pump. Usually I suck the water through the hose until it almost reaches the end, then submerge the hose and attach it to the skimmer.

7) Now I have to return to the extension pole handle, pick it up and vacuum the bottom of the pool. In most pools I like to start with the shallow end and work towards the deep end. With smaller pools that is all that is required, with the average pool, one vacuums the shallow end, the middle from the sides, and then the shallow end from that end of the pool, traveling in a circle around the pool. Each time you push the vacuum head forwards, then turn, pull back in another row, then step to the side, push forwards, turn the head, then then pull back, then step again. After a while one can judge just how far to step to align the line in the dirt on the bottom with the width of the vacuum head. At that point you can vacuum a pool in the dark without missing anything and leaving dirt stripes in the pool. It is similar to mowing a lawn. The outside wheels of the lawn mower overlap slightly to make sure you have perfect coverage. A vacuum head is used in the same way.

8) By now the entire bottom is cleaned, the tile is clean, and the pool is free of any debris. The only thing left to clean is the dust on the walls and steps. It is time to disconnect the vacuum head, roll up my hose and reattach the wall brush. brush down the walls (from the tile down) and steps, making sure that you cover everything that vacuuming didn’t get. Brushing on the edge of skimmers, steps, and ladders is important. Always be diligent about brushing all tops and front edges of the steps as algae will start there fastest. Be careful with any area of the pool that is in shade often, as that is also a prime place where algae will start.

9) Remove your wall brush and get your equipment ready to leave the yard (rolling up hose and collecting vacuum head, wall brush, and net connected to pole) and head back to the pump and filter area.

10) Turn off the circulation and empty the pump basket again. Backwash the filter. If the filter is D.E. (diatomaceous earth) the handle will usually be in the down locked position, if it is a sand filter, it will be in the upright locked position. Put the handle in the backwash position and turn the circulation on. Let it run for about a full minute. If there is a lot of dirt coming out you will need to let it run for a couple minutes, but be careful you don’t lower the pool water level too much. Also, if there is sand coming from the backwash hose, that usually means a lateral is broken and your pool filter will need to be repaired. Turn the circulation back on and look for dirt blowback into the pool. If clear and circulation has returned, it is back in prime. If it is a D.E. filter, then need to recharge the D.E. Use a container the size of a number ten coffee to fill the filter with D.E. and pour it into the skimmer as it is running, being careful to wipe the excess off with water and your hand. Make sure the majority of the D.E. is going down and then brush the rest in with your hand. If there is a pool sweep it should be replaced now.

11) The next step when you have finished completely with back washing is the last thing you do as you are getting ready to leave. Check the chemicals. Use your chemical test kit. Usually this is two or three parts. The average pool man uses 2 parts, using OTO and Phenol Red reagents (test chemicals).

A) OTO is for acidity and Phenol red is for Chlorine level. The chlorine level should be between 2.5 and 3.0. If it is a nice light yellow it is good. Darker yellow can be up to 5.0. This isn’t harmful to people but a pool inspector for the health department will close the pool until it goes down. If it looks orange or red it is much too high and you need to add water, turn on the aerator, or add some chemical such as algaecide until the chlorine level returns to a normal level before anyone should get into the swimming pool. Most average pools only need one tablet of chlorine a week during the winter and at least two tablets a week in the summer. I am in Phoenix, Arizona where there is a lot of sun light so the chlorine dissipates more quickly than in cooler climates.

B) The Phenol Red test should be between 7.2 and 7.6. At 8.0 or higher you should add at least one quart of acid to the pool (The acid has instructions printed on it usually as to how many quarts are necessary per how many gallons of water the pool contains.)and leave the circulation running for at least an hour while you are adding it and immediately afterwards to avoid staining the plaster.

12) The last step is to check and make sure everything is good before you leave. Make sure the backwash valve is in the right position. Make sure your equipment is all together and out of the yard. If the circulation needs to run on a timer instead of constantly, it needs to be returned to timer position so it will come on when the timer is set. IF you have added acid, even if there is a timer, you need to let it run for at least an hour, most clients can be told to shut it off and back to timer mode in an hour but if no one is home, you must leave the circulation running until the timer cuts it off on the next rotation.

Leave the yard, check the gates and latches, get in the truck and go to the next pool.

Article Source: http://EzineArticles.com/expert/Steven_T_Walker/1161773

Article Source: http://EzineArticles.com/6639671

Categories diy

How to Care For Your Pool Cue

Now that you’ve purchased your very own pool cue, and hopefully followed some of the advice from earlier articles before doing so, you’re going to want to take care of your investment. A good cue is relatively durable and forgiving, but all cues require care and a little bit of maintenance. We’re going to be talking about wood pool cues here, graphite and fiberglass sticks are virtually bulletproof and require somewhat less care. If you are into swimming pool removal Sydney it would be nice if you cleaned up after you get rid of the pool.

CASES. You are going to need a case in order to carry your new cue to the pool hall. I would think that would be obvious but yet I constantly see people coming in carrying their new cue in their hand. Come on now, you just spent your money and took the time picking out a pool cue that you love, but you can’t spring for some sort of case? Basic cases are vinyl or soft-sided material. These will protect your cue against minor drops and dings, but not much else. I highly recommend hard cases just because they offer so much protection. Some cases are tested by driving a car over them without damaging the cue inside! Your pool cue can take a lot of damage in your car, in your house, and even at your billiard hall so protect it as best as you can.

While we’re on the subject of transporting your cue – never leave your pool cue in your car, especially in the trunk! Wood is highly susceptible to temperature changes and to humidity, so avoid storing your billiard stick in your vehicle at all cost. The wood will expand and contract which could lead to warping, loose joints, and cracked points.

THE TIP. The tip of your pool cue (the part that hits the ball) is the most important part of the stick. You can shoot pool with a tree branch or a broom handle – or the most warped stick in the house, if the tip is solid and properly shaped you can play with it! No joking! Screw- on tips are a serious no-no, so don’t even go there. “Real” tips are glued on and come in a variety of hardness. Soft tips hold chalk better and are better for applying “English” but they wear out and mushroom quickly. Extremely hard tips last forever but need constant re-chalking. Some say they make for a more accurate shot as well. A medium hardness tip should be fine for most players. The tip must be able to hold chalk, so periodic scuffing is necessary. The roundness of the tip should be maintained with a shaper. Most players compare the roundness to that of a nickel, though some prefer the tightness of a “dime curve”. Shaping and scuffing too often will cause your tip to disappear quickly, so only shape and scuff when necessary. The sides of the tip should be even with the ferrule, not mushroomed out. Get yourself a scuffer/shaper and take care of that tip!

THE SHAFT. When you first purchased your pool cue the shaft was nice and smooth, and slid through your bridge hand ever-so-easily. That didn’t last long, did it? The sweat, oils, and dirt from your hand will gum up on your shaft very quickly, making it sticky and not so smooth. How do you prevent this, and how do you clean it up? First, you cannot do much to prevent this from happening aside from washing your hands often and keeping them clean and dry. Some people use powder, like baby powder, on their bridge hand and on the cue. A tiny amount of powder that has been thoroughly rubbed in to your hand is okay – it makes your skin softer, but powder should never be used as a lubricant. Wash your hands! Powder will cause your pool cue shaft to gum up more quickly, and powder ruins the felt on the pool table. Nothing looks worse or plays worse than clean green felt with white baby powder all over it because some idiot thought that they had to dump powder all over themselves in order to shoot better! It just ain’t so – so don’t do it. It is bad for your cue and bad for the table. Have some respect, huh?

Wiping the shaft of your pool cue down with a soft cloth in the course of play will limit the amount of crud that builds up on it. Not eating or drinking with your bridge hand is a good habit to get in to as well. Using a very light leather burnishing pad occasionally is a good idea. In time however, the pores in the wood of the shaft will become completely crammed full of dirt and oils and it will need a thorough cleaning. I’m going to tell you how I do it, just remember that if you screw up you could ruin your cue. Forever. The first step is to completely wipe down the shaft (not he ferrule) with a soft cloth and some rubbing alcohol. You don’t want to soak the wood with it, use just enough to clean the wood. Continue wiping with alcohol until you don’t see dirt on the cloth. The alcohol removes the dirt and oil from the wood and opens the pores of the wood. Now you want to just let it sit and dry for several hours. Now it’s time for wax! That’s right, I said wax. You need to use 100% carnauba wax for this. Car wax is fine, as long as it is 100% carnauba wax.

Just like waxing a car, apply a coat of wax with a soft cloth or applicator and let it dry to a haze. You cannot let it dry too long, just let it sit awhile and have some patience. Once the wax has dried thoroughly you’ll want to wipe it off – and immediately start working the shaft with a leather burnishing pad (or a plain piece of thick leather if you don’t have a burnisher – which you should have anyway). Wrap the leather around the shaft and stoke it up and down as fast as you can (yes, it sounds dirty). The more you rub and the faster you rub the hotter the wax will become, which allows it to work into the pores of the wood. When you are finished you will have a beautiful, smooth shaft once again – but you’re not finished just yet! You are going to need to run through all of the steps again, except for the alcohol part. Apply more wax, let it dry, rub the heck out of it, repeat until you have at least 3-4 layers of wax thoroughly worked into the wood. Now take care of the tip and go shoot some pool!

THE BUTT. The butt of your pool cue shouldn’t need much maintenance at all. Keep it clean and wipe it down with a soft cloth during and after play. Don’t hit things with it and don’t drop (or throw) it on the floor. The joints will loosen up, the wood will crack, and parts will separate if you do. Then you’ll have to buy a whole new cue.

“Dings” in the Shaft. Nothing is more annoying than working your pool cue through your bridge and feeling little “dings” in the wood. As hard as we try to take care of our pool cues these little dents always seem to show up – as if by magic. Here is a method I learned that will remove small imperfections from your pool stick’s shaft. First, you need to wipe the shaft down with rubbing alcohol just like in the paragraph on cleaning the shaft. This will open the pores of the wood. Next, find a spot where you can place the shaft where it will not roll, and where it won’t get bumped. Lay the shaft (horizontally) down with the dings that you want to remove facing up. Now, soak a very small piece of tissue with water and roll it into a ball (think miniature spitball) and place the tissue ball directly on the indented spot on the shaft. It is important that the tissue ball not be larger than the actual indent on the shaft. Let that set until it dries completely – what happens is that the wood in that one tiny area absorbs the water from the tissue and swells, bringing that spot level with the surrounding wood. In a perfect world the “ding” will have disappeared, but what usually happens is that the “ding” becomes a small “bump” – which is fine because bumps can be worked out with a burnishing pad fairly easily. Once you have all of your “dings” up to level or slightly above level it is time to wax the shaft. Follow the instructions above for the proper method to do this. Of course another way to remove dings and dents from your pool cue would be to take it to a professional, but where’s the fun in that?

NEVER USE ABRASIVES. Ever. Period. That means no sandpaper, no scouring pads, no wet/dry paper, nothing. If it was designed to remove wood than keep it far away from your pool cue! You never want to remove a layer of wood just to make it smooth – you want to clean the existing wood to maintain the shape, balance, and feel of the cue.

Your pool cue represents an investment on your part, so keeping it clean and in good condition will make it last a lifetime – now that’s a lot of pool playing!

Written by Steve Didier

please visit us and learn more at [http://www.vipbilliards.net]

Article Source: http://EzineArticles.com/expert/Steve_Didier/343314

Article Source: http://EzineArticles.com/2444870

You Can Get Good Source Of Ideas About Auto Repair In The Article Below

Learning about auto repair may seem like a daunting endeavor if you do not sure how to begin. The tips presented below will give you get started. Keep reading to discover some auto repair tips. So, one thing that you will definitely need to do is purchase a really good leather conditioner for your car protection.

This shows that a mechanic has passed a special test for competence and has more than two years of experience. This tells you that the best mechanic is qualified to work on your automobile.

Get a good battery charger and be sure it is always in your car. Learn how to find the charger with ease.

Ask all the questions you have regarding your car when bringing it in to their shop. Preventing automotive issues is a valuable skill to save money annually.

If something is not clear, talk to the mechanic first. You do not want unpleasant surprises when you go to get the final bill.

Ask mechanics if they have done work on the same make and model of vehicle before. If they have worked on the same type vehicle you have, they will probably know what must be done to help your car work again.

Keep a record of every car is fixed or maintained. If your car ends up with more problems later on, it is useful to be able to give your mechanic all such records.

Test drive your car before paying the auto repair shop.

Be aware of unscrupulous mechanics who make unnecessary repairs to your vehicle. A good mechanic should let you know if they noticed parts that are starting to get worn down and will never perform work without your full approval. Never bring your car to someone who preforms unnecessary repairs.

Don’t leave valuables in your car when it’s being repaired.Mechanics may need to take these items out to do the work and they aren’t responsible if an item is damaged or missing.You want to remove items from your trunk.

The weight of a big key chain. If your key starts sticking, install new tumblers and use a lighter key chain.

You don’t need to visit the dealer in order to get your auto repairs done. There are several reputable technicians that may be closer in proximity to your house. Find someone who you are comfortable with and reliable.

Keep in mind that DIY auto repairs can be dangerous. Always have somebody nearby to help you just in case there is an emergency. Buy quality tools that will last and not break under pressure. This holds true particularly in the case of the tools needed for things such as tire changing tools. The jack you are working on the underside of the car. This is why it is wise for you to use quality hydraulic floor jacks and jack with stands.

Avoid diagnosing your own car problems yourself.What seems like something small may actually be quite complicated, especially in the newer electric cars and also the newer computerized vehicles. Let the diagnosing. Let them know what the problem is and the noises you hear, but let them be the ones to diagnose the issue.

Some untrustworthy shops replace your original tires. They sell your tires and make a profit off of those who do not know enough to check. Mark your tires before taking your car off. If the chalk isn’t present when you get the car, you have definitely been had.

If you need to have your car fixed, but are on a tight budget, then get in touch with your vocational school’s auto repair department. You will pay a very low rate for the repairs in return for allowing students fix your car while under the supervision of a licensed mechanic.

Don’t trust any parts that a part will last you a lifetime. This is a way to grab more money from you. One example is that some vehicles say their transmission fluid.While it’s not changed as much as typical fluid, you need to be sure it’s changed about every 80,000 miles.

Bleed your brakes before you take your work is done on a test drive. Test for any leaks to ensure that no fluid can run out. You should then be ready for test drive the car safely on low-traffic roads. Start slow to ensure that your repairs were successful.

AAA is a good company to look into when you’ve got auto repair issues. You are going to find discounts on an annual AAA membership if you shop around.

Do not add water in the windshield washer fluid. Water can clean your windshield, but since the system requires that specific fluid, but that compartment is designed only to hold a special kind of fluid. Check the compartment when you can to be sure that it gets refills when it needs to be refilled. Don’t insist if the compartment to empty before refilling.

Seek second opinions prior to committing to major repairs on your car. The mechanic may be offended or offer a special price to do repairs right away, but be suspicious of this.

Do not try to repair your car unless you have experience doing it. You could end up voiding your warranty otherwise. This makes you totally responsible for all of your future repairs yourself.

Rotating your tires regularly can prevent wear and tear on tires. You need to get the tires rotated about every 6000 miles, but it may depend on the model and make of the vehicle. Get new tires to avoid too much wear and tear too quickly.

Check the amps on your fuses before attempting to replace a dead fuse. You need to remember to get fuses replaced with ones that has the same amperage. If your fuses should be replaced often, there might be something wrong with the electric systems in your car.

You have to know what your mechanic will do before you say yes to it. Ask him how much that will be.

Learning about the warning signs of impending car problems can save you money. This and the other tips can help you learn all about simple auto repair. Remember what you have learned here the next time your car starts having problems. Any good source of car leather protection, click here.

Risk Control Hierarchy Refines Electrical Safety

In the late 1880s, a young boy was electrocuted when he accidentally touched an unlabeled, energized telegraph wire. That incident ignited an inventor by the name of Harold Pitney Brown to make an impassioned plea in a New York Post editorial to limit telegraph transmissions to what he considered a safer level of 300 Volts. If you would like to make a booking with our electrician Brisbane Southside go to Emergencybrisbaneelectrician.com.au.

Perhaps Harold thought that limiting electrical transmissions to levels of 300 Volts or less would provide instant electrical safety. With over 120 years of hindsight, we view things much differently today. Yet, Harold stumbled across two important concepts. The notion of “300 Volts” is a technical discussion about the laws of electrical energy (Ohm’s Law, etc) that lends understanding to how electrical energy can kill or maim. On the other hand, the term “safe” reflects a working knowledge of the fundamental principles of safety. Our challenge is to combine our technical understanding of electricity with the principles of safety to ensure electrical safety is both practical and effective. The better we understand both concepts the greater the likelihood we will have to improve the status quo. The Risk Control Hierarchy (RCH) does an excellent job in blending these two key concepts.

Risk Control Hierarchy

The heartbeat of safety is the Risk Control Hierarchy (RCH), which is found in Appendix G of the ANSI Z10 Standard. The RCH helps us prioritize safety initiatives from least effective to most effective. For example, will you be safer wearing a helmet while riding a motorcycle or by selling it altogether? Obviously, selling the motorcycle eliminates the risk of an accident, while wearing a helmet offers protection to your head from the risk of a head injury during an accident. The RCH works by helping us rank risk reduction measures from most effective to least effective as per below:

1.) Eliminating the risk.
2.) Substituting a lesser risk.
3.) Engineering around risk.
4.) Awareness of every risk.
5.) Administrate and regulate behavior around risk.
6.) Protect workers while exposed to risk.

Note that each step above is equally important, yet not equally effective in protecting workers. Eliminating a risk is the most effective way to keep workers safe while protection from a risk by using Personal Protection Equipment (PPE) is least effective. There have been great improvements in the design of PPE, but its primary purpose is keeping workers alive – not 100% safe.

Safety and Risk

Risk, which is defined as exposure to a hazard, is two-pronged. There is the probability of exposure and severity of potential injury. For example, a 120V outlet is a greater risk than a 13.8KV switchgear line-up because more people are exposed to the 120V outlet. Since risk is exposure to hazards, then safety is the reduction and management of risk. The management responsibility of an electrical safety program typically falls to an electrical engineer because he or she understands electricity. In our modern world we can never eliminate the risk, but are very good at finding new ways to reduce risk.

Another way to look at risk is the chart (Figure 2) developed by Ray Jones which shows the relationship between the worker and the safety infrastructure above him. A worker performing tasks must make many complex and specific the decisions that affect his safety. In the case of electrical safety, energy isolation is very personal for electricians facing deadly electrical energy every time they open a panel. By the time they touch electricity, it’s too late.

Zero Energy Verification–Is There Voltage?

Electrical accidents are impossible without electrical energy. If an electrician comes into direct contact with electrical energy, there is a 5% fatality rate. Shocks and burns comprise the remaining 95%. The NFPA 70e is very specific on how to isolate electrical energy. First, all voltage sources must be located and labeled. Multiple voltage sources are commonplace today due to the proliferation of back-up generators and UPS’s. Next, voltage testing devices must be validated using the LIVE-DEAD-LIVE procedure. Additionally, the voltage tester must also physically contact the voltage and must verify each phase voltage to ground.

The RCH and Electrical Safety

How does the RCH apply to electrical safety?
1. Elimination -Removing all electrical energy exposure.
2. Substitution -Lowering the electrical energy exposure.
3. Engineering Controls -Reinventing ways to control electrical energy exposure.
4. Awareness -Revealing and labeling all sources of electrical energy.
5. Administrative Controls -Regulations that teach personnel safety around electrical energy.
6. Personal Protection -Reducing risks of working on live voltage.

Electrical workers are exposed to the greatest risks at the lower levels of the RCH. Recognizing that these ‘residual risks’ are present; the NFPA 70e tells workers how to perform their work safely in spite of these risks. In fact a large portion of the NFPA 70e details how to best manage these risks through Awareness, Administration, and Personal Protection. On the other hand, the greatest opportunity for risk reduction comes by focusing in the upper part of the RCH. Huge improvements in electrical safety will come by Eliminating Substituting, and Engineering solutions that manage electrical energy exposure.
The Department of Energy (DOE)

For better insight into the RCH process, let’s look at a 2005 Department of Energy report on their electrical safety record. This report cited six reasons for their 14.1 electrical incidents per month.
Within this DOE report, “hazard identification” [Table 1] stood out as an administrative control issue resulting in numerous electrical incidents. The solution was to get tougher administrators or look for improvements higher up in the RCH. Right above Administrative Controls (see Figure 1) we learn that increasing employee’s awareness of electrical hazards will reduce these types of incidents. A potential solution is to label and mark all voltage sources (hazards) feeding the electrical system. Voltage indicators and voltage portals wired to each voltage source provides two benefits: It identifies the voltage source and provides a means to check the status of that voltage source without exposure to voltage. Apply the same process to “LO/TO violations”.

CAUSES OF INCIDENTS PRESENT RCH PRINCIPLE INCREASED RISK REDUCTION RCH PRINCIPLE Lack of hazard identification.

ADMINISTRATIVE Properly administrating NFPA 70e requires all electrical enclosures to have warning labels with incident energy level (calories). AWARENESS /ELIMINATION Marking all energy sources on the panel exterior provides personnel with simple yet safe hazard identification.

LO/TO violations including shortcuts or lack of energy verification

ADMINISTRATIVE Can the LO/TO procedure be rewritten to reduce exposure to voltage?

ELIMINATION /SUBSTITUTION Thru-door voltage pre-checking ‘eliminates’ all exposure to voltage for mechanical LO/TO* and provide significant risk reduction for Electrical LO/TO.

Reducing electrical energy to Cat 0/1 will greatly reduce the potential arc flash energy SUBSTITUTION Lowering the arc flash energy effectively ‘substitutes’ for a lower risk for a higher risk.

Elimination: The Hall of Fame of Safety

We can enter the Electrical Safety Hall of Fame by finding ways to eliminate voltage exposure. Here are a few practical examples that can be implemented today:
o Mechanical Lock-out Tag-out [LOTO]: LOTO procedures requiring electricians to verify zero energy before performing mechanical maintenance needlessly exposes workers to voltage. Since all voltages do not create mechanical motion, through-door voltage checking devices as part of a mechanical LOTO procedure will eliminate voltage exposure (see Appendix B).
o Why open a control panel? What maintenance functions can be moved to the outside of the panel? Thru-door data access ports are becoming commonplace because they allow programming with the panel door closed (Figure 3). A more recent example is an unmanaged Ethernet switch mounted outside the panel. This unique device allows full through-door access for a worker to troubleshoot and reset the Ethernet switch (Figure 4). What other devices can be re-engineered around through-door electrical safety? Perhaps putting certain branch circuit breakers on the outside of the panel is a good application?
o Control Panel Design: Provide a physical separation between the power and control compartments within an enclosure may become a standard. Voltages under 50 volts are considered safe, so reducing the control power to 24VDC makes the control power section safe to work on while it is energized.
These above examples are only ‘scratching the surface’, so I challenge you to find ways to eliminate voltage exposure.

Conclusion

When safety works perfectly, nothing happens! When there is an incident or a close call the RCH should be an inspiration to find a better way. By applying the RCH principles to electrical safety risks, it will open our eyes to see more practical ways to reduce those risks. Perhaps, we would expend more resources finding electrical safety solutions that will provide both higher safety and productivity dividends.

Harold Pitney Brown intuitively knew that eliminating risks would save lives. He just got one detail wrong when he thought that 300 Volts was not a risk. Now for the rest of the story: To prove that AC voltage is more lethal than DC, Thomas Edison hired Harold Pitney Brown to develop the first electric chair that executed William Kemmler on August 6, 1890. For electrical safety of your home, click here.

Article Source: http://EzineArticles.com/expert/Philip_B_Allen/544420

Article Source: http://EzineArticles.com/3679965

Effective Search Engine Optimization Techniques To Improve Your Serp Rank

All site owners want to realize success on some level. SEO consultant Sydney can help you achieve your profits and visibility. But this type of success doesn’t happen without first understanding how SEO works. Use this article to help you with your SEO tips.

Use header tags to your website. If you need to, use CSS to make them shorter. Headers work to your advantage because a search engine checks this before ranking process.

Using product feeds can really help draw traffic and business to your site. Feeds can contain information about your business such as prices, descriptions and prices.Submit them to sites for shoppers as well as to search engines.

Don’t try using Flash on your website if you want it to be search engine friendly. Flash can not be read by the spiders and text used in flash won’t be indexed. You will need to have content both crawlable and visible at all times.

A key to search engine results is to include a site map. Spiders will have an easier time crawling your site through a site map. A big site might require more than 1 site map. A good rule to go by is to show only 100 links on each site map.

Add a site map if you want to get more visitors. A site map is beneficial in ensuring that all the individual pages on your website.

Blogging increases your own website will increase traffic because it will be more visible to search engine results.This can also increase your site.

A site map which has your keywords. Site maps are great ways for both search engine optimization.

Keep your site focused on a dozen keywords or phrases that really capture the essence of what your site is about. Use analytical tools to figure out which keywords will bring you the most traffic.

Use online ads through sites such as adwords or adbrite. DIY SEO might not always produce the jump in rankings you want.These types of advertisers specialize in increasing your hits. Using these advertising products from a top engine like Google could brings great traffic to your site.

SEO is how you can get more people to your customers find you.Many business to not take this really is.

You can give your SEO a good boost by using off-site linking to reputable websites. This is a credible source of information. Search engines like to see relevant off-site links more than internal links to your own pages. To maximize your rank, find linking options that will also link to your website.

Join the local Chamber of Commerce and Better Business Bureau for better search engine ranking. This assists with local searches because it is usually linked to you.

Make sure to write for human readers when doing your content is easy to read and understand. While you will need to include important keywords that the bots are looking for, understand that the bots are not making purchases from you, so you can optimize the content afterwards. You will want to be able to easily read your site. You will fail if it is not.

You need to get with a service that doesn’t block your domain ownership information. Google may see this as questionable and won’t even rank your site.

A good way to give your website a higher search engine ranking is to get a second hand domain name. Search engines give more weight to domain names that have been registered for longer than two years.

Search engines will lower your page rankings if you are found to be manipulating the rating system to artificially achieve top search engine optimization tactics. Be advised and ethically hone your search engine rankings.

Search engine optimization — or SEO — is simply a core online marketing concept. You simply use key words or phrases in your content to raise your search engine rankings. This helps to connect search engine users with the visibility of your site.

Make sure to configure your server so that it’s case-sensitive for URLS.

You can get many more links that lead to your site by making comments on relevant blogs.If you put a good and meaningful comment on a blog, most blog owners will allow you to leave your link in the comment. You should not leave your link on blogs that have nothing to do with the content of your site, not throw people off. You will find it easy to spread around comments and links on blogs where you’re familiar with the subject.

Sign your website up to as many search engines to boost its visibility and recognition. You will find the link to access this on the page of each search engine’s page. Use a solid description and keywords so you site properly categorized.

Include many keyword phrases throughout your site. This means you to maximize your domain now. Your site should ideally trail back to whatever keyword you want to be searched.

There are some tricks that can do to ensure your site is search engine friendly. Keep in mind that you need to please both your visitors and search engine crawlers. Your text should be easy to read with standard-size fonts that are easy on everyone’s eyes. These are simple principles that can make your site on the right path.

Search engine optimization encompasses many things. You will quickly find that there are many steps to SEO to help improve your search engine rankings. Try using these tips to begin properly in search engine optimization. Click here if we want to check your keyword rankings.