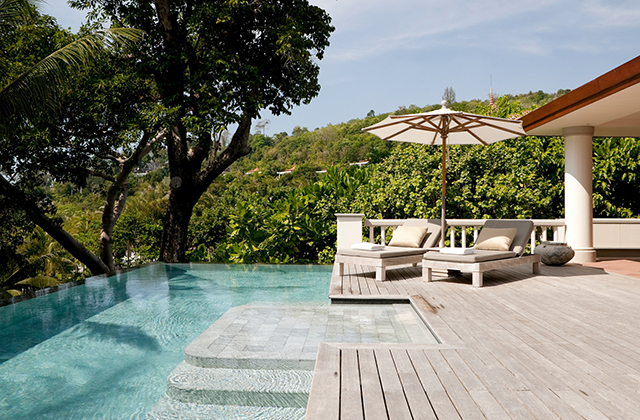
In looking back at one of my past careers, it occurred to me that no one has ever seemed to write a definitive article on swimming pool maintenance from the point of view of the Pool Tech. Water chemistry is a science by itself but most people in the pool business know that there are two main chemical tests for swimming pool water and those are Chlorine level and Acidity (PH). When a pool man enters the yard he must be ready to deal with three main issues – chemicals, cleaning, and circulation. Lack of chlorine will turn the water into an algae bed. Lack of proper acidity makes the chlorine useless. Loss of circulation and lack of sunlight on the plaster surface below the water causes algae. Everything has to be in proper balance. Chemicals, cleaning, and circulation (water flowability). Walking into a yard there are many things to consider. First, this is sort of a security position because you are entering someone’s private property. After a while you learn all about their kids, their pets, their plants that must be considered delicate, and any idiosyncrasies having to do with their property and pools system. The pool removal Sydney with no use of any chemical they can assure to let go of your pool once only.
What you must carry in the yard with you to do your job is usually an extension pole, a vacuum head, a vacuum hose, a leaf net, and a wall brush. You should also have a chemical test kit handy and a pump basket wrench to use for sticky plastic lids.
I will go through the entire process as I did while I worked as a swimming pool tech, when I arrived at a swimming pool – step by step.
When you have arrived at the pool, you lay your equipment down and look at the pool. How much of a problem is it? How fast will you have to move in order to get the pool cleaned safely and get on to the next one?
Wind is the enemy of the Pool Tech. Some times of the year the pool will look fabulous and you will be able to leaf out a few small particles and brush the steps the walls, and the floor (towards the drain) down. Sometimes following high winds and/or bad rain storms you will arrive and the pool will have lawn furniture and tree limbs in it. Some have vegetation problems constantly, created by trees or sloppy landscape crew members. You will have to learn how to measure the level of clean that the customer wants. You can only do what you can in a certain amount of time allotted for each pool on your route but some times the pool is a disaster and you must run late all week until they are all back to normal at least until you leave. The following are the steps I would suggest for anyone who cleans pools for a living.
1) It is time to empty all baskets for proper circulation. That means that with some pools I need to backwash the filter before and after I vacuum. Usually though, I will arrive at the pool, empty the skimmer baskets and set them on the deck. If there is an automatic pool sweep type cleaner it is best to remove it. Until you finish.
2) Then I need to make sure the system (circulation) is turned off and then will empty the pump basket near the filter. A lot of old plastic pump basket lids stick and it is necessary to use a pump basket wrench. If the pool has an older pump, sometimes it requires priming to turn the power back on and continue circulation. A small basket or large canister will serve to prime the pump if a hose isn’t close. As I turn the pump back on, the pump basket must be full of water enough to get the system working immediately. The water will then pass through the filter and plumbing to the pool and when I look at the water circulation, I will usually get some air bubbles coming from the pool returns so that tells me it is primed and running.
3) I check the pool tile and if it is covered with debris then I take the extension pole and attach the wall brush, then brush the tile at the water level quickly once around the entire pool.
4) Then Detach the wall brush for now, attach the leaf net to the extension pole, and leaf out the surface of the water first, then I get what bigger leaves and debris I can remove from the bottom with my net.
5) Now I detach the leaf net and attach the vacuum head. The vacuum hose must be attached to the top of the vacuum head and submerged in the water with the handle of the pole sticking out resting on the edge of the pool while you stretch out your hose.
6) With some pools there is an actual vacuum port (hole in the wall) for the hose to attach to but with most pools, I have to attach the hose to the skimmer suction plumbing hole, usually located in the back portion of the skimmer under the basket area. The hose must be full of water, almost submerged as sucking air will kill the prime in the pump. Usually I suck the water through the hose until it almost reaches the end, then submerge the hose and attach it to the skimmer.
7) Now I have to return to the extension pole handle, pick it up and vacuum the bottom of the pool. In most pools I like to start with the shallow end and work towards the deep end. With smaller pools that is all that is required, with the average pool, one vacuums the shallow end, the middle from the sides, and then the shallow end from that end of the pool, traveling in a circle around the pool. Each time you push the vacuum head forwards, then turn, pull back in another row, then step to the side, push forwards, turn the head, then then pull back, then step again. After a while one can judge just how far to step to align the line in the dirt on the bottom with the width of the vacuum head. At that point you can vacuum a pool in the dark without missing anything and leaving dirt stripes in the pool. It is similar to mowing a lawn. The outside wheels of the lawn mower overlap slightly to make sure you have perfect coverage. A vacuum head is used in the same way.
8) By now the entire bottom is cleaned, the tile is clean, and the pool is free of any debris. The only thing left to clean is the dust on the walls and steps. It is time to disconnect the vacuum head, roll up my hose and reattach the wall brush. brush down the walls (from the tile down) and steps, making sure that you cover everything that vacuuming didn’t get. Brushing on the edge of skimmers, steps, and ladders is important. Always be diligent about brushing all tops and front edges of the steps as algae will start there fastest. Be careful with any area of the pool that is in shade often, as that is also a prime place where algae will start.
9) Remove your wall brush and get your equipment ready to leave the yard (rolling up hose and collecting vacuum head, wall brush, and net connected to pole) and head back to the pump and filter area.
10) Turn off the circulation and empty the pump basket again. Backwash the filter. If the filter is D.E. (diatomaceous earth) the handle will usually be in the down locked position, if it is a sand filter, it will be in the upright locked position. Put the handle in the backwash position and turn the circulation on. Let it run for about a full minute. If there is a lot of dirt coming out you will need to let it run for a couple minutes, but be careful you don’t lower the pool water level too much. Also, if there is sand coming from the backwash hose, that usually means a lateral is broken and your pool filter will need to be repaired. Turn the circulation back on and look for dirt blowback into the pool. If clear and circulation has returned, it is back in prime. If it is a D.E. filter, then need to recharge the D.E. Use a container the size of a number ten coffee to fill the filter with D.E. and pour it into the skimmer as it is running, being careful to wipe the excess off with water and your hand. Make sure the majority of the D.E. is going down and then brush the rest in with your hand. If there is a pool sweep it should be replaced now.
11) The next step when you have finished completely with back washing is the last thing you do as you are getting ready to leave. Check the chemicals. Use your chemical test kit. Usually this is two or three parts. The average pool man uses 2 parts, using OTO and Phenol Red reagents (test chemicals).
A) OTO is for acidity and Phenol red is for Chlorine level. The chlorine level should be between 2.5 and 3.0. If it is a nice light yellow it is good. Darker yellow can be up to 5.0. This isn’t harmful to people but a pool inspector for the health department will close the pool until it goes down. If it looks orange or red it is much too high and you need to add water, turn on the aerator, or add some chemical such as algaecide until the chlorine level returns to a normal level before anyone should get into the swimming pool. Most average pools only need one tablet of chlorine a week during the winter and at least two tablets a week in the summer. I am in Phoenix, Arizona where there is a lot of sun light so the chlorine dissipates more quickly than in cooler climates.
B) The Phenol Red test should be between 7.2 and 7.6. At 8.0 or higher you should add at least one quart of acid to the pool (The acid has instructions printed on it usually as to how many quarts are necessary per how many gallons of water the pool contains.)and leave the circulation running for at least an hour while you are adding it and immediately afterwards to avoid staining the plaster.
12) The last step is to check and make sure everything is good before you leave. Make sure the backwash valve is in the right position. Make sure your equipment is all together and out of the yard. If the circulation needs to run on a timer instead of constantly, it needs to be returned to timer position so it will come on when the timer is set. IF you have added acid, even if there is a timer, you need to let it run for at least an hour, most clients can be told to shut it off and back to timer mode in an hour but if no one is home, you must leave the circulation running until the timer cuts it off on the next rotation.
Leave the yard, check the gates and latches, get in the truck and go to the next pool.
Article Source: http://EzineArticles.com/expert/Steven_T_Walker/1161773
Article Source: http://EzineArticles.com/6639671